

Quick Summary
A whole home audio wiring plan starts on paper with a room-by-room coverage map showing each speaker location and shared wall or ceiling spaces. Next, decide how many zones you need, choose wired, wireless or hybrid architecture, then size speaker wire and route cable before drywall.
- Walk every floor and list each room where you want sound before drilling any holes.
- Group rooms with the same use into one zone, and split rooms with different uses into separate zones.
- Measure each run and add 10 to 15 percent slack before choosing speaker wire gauge.
- Keep low-voltage speaker wire separate from high-voltage electrical wiring to avoid hum.
- Label every wire at both ends and photograph routes before drywall goes up.
Table of Contents
- Start With a Room-by-Room Audio Coverage Map
- Decide How Many Audio Zones You Need and Where They Split
- Choose Wired, Wireless, or Hybrid Architecture
- Pick Speaker Wire Gauge and Run Lengths for Each Zone
- Lay Out the Central Equipment Location and Multi-Zone Amplifier
- Route Cables Before Drywall and Keep Low-Voltage Runs Separate from Mains
- Plan Your Multi-Zone Audio System Commissioning and Future Expansion
- Book Your Whole-Home Audio Plan Review With Elite Connect
- Frequently Asked Questions
Start With a Room-by-Room Audio Coverage Map
Last Updated: November 5, 2026
A whole home audio wiring plan starts on paper, not with a wire spool. Before anyone drills a hole, walk every floor and list each room where you want sound. Note which rooms share walls, ceilings and doorways, because those shared spaces decide how hard the cable run will be.
A room map gives the homeowner and installer a shared picture of what needs to be wired and where. Whole-home audio is a planning problem first and an installation problem second.
Make a simple table for each room. Include these details:
- Room name and floor
- Speaker type (in-ceiling, in-wall, or outdoor)
- Expected listening use (music, TV, background sound)
- Wall and ceiling material
- Nearby cable routes or open attic and crawl spaces
Mark the speaker locations on the floor plan with a pencil first. Then check each location against furniture, windows and HVAC vents. A speaker placed behind a sofa or too close to a return vent will sound poor no matter how good the equipment is.
Watch out: Skipping rooms that seem unimportant, like closets, bathrooms or covered patios, is a common mistake. Adding those rooms after the walls are closed usually costs far more.
Decide How Many Audio Zones You Need and Where They Split
A zone is a group of speakers that plays the same source at the same volume. Each zone is controlled separately from the others. The number of zones decides how many speaker wire runs must return to the central location.
A typical home of this size often needs several zones, each with dedicated speaker wire to a central location. Use your own household's needs as the starting point.
Ask these questions to set your zone count:
- Does the kitchen need music while the family watches TV upstairs?
- Will the patio or pool area play separately from indoor rooms?
- Do bedrooms need their own volume control?
- Are there rooms that always play the same source, such as a home office and a den?
Rooms that share a use, like a kitchen and dining room, can often sit in one zone. Rooms with different uses, such as a bedroom and a family room, usually need their own zones. Splitting zones too finely adds amplifier channels and wire, so find a balance that fits your budget and daily needs.
Choose Wired, Wireless, or Hybrid Architecture
Wired systems send audio through speaker wire from the central equipment to each speaker. Wireless systems send audio over Wi-Fi or Bluetooth. Hybrid systems combine both, often using wire for fixed rooms and wireless for outdoor or hard-to-reach spaces.
Plug-and-play audio systems are projected to hold a 58.0% market share in 2026, according to Future Market Insights market report on home audio equipment. Many buyers choose these systems for fast setup. Fast setup is not the same as dependable performance, though.
Here is how the three options compare:
| Architecture | Best For | Main Trade-off |
|---|---|---|
| Wired | New construction and whole-home coverage | Requires cable routes before drywall |
| Wireless | Retrofit projects and renters | Depends on network strength |
| Hybrid | Mixed-age homes with outdoor areas | More planning and two systems to manage |
Pros of wired systems: stable audio, consistent volume, and no dependence on Wi-Fi. Cons of wired systems: more labor and planning before walls close. Pros of wireless systems: simpler installation and easy expansion. Cons of wireless systems: audio can drop when the network is busy.
For most new construction, wiring every fixed room now is a sound approach. You can add wireless speakers later for patios or garages without reopening walls.
Pick Speaker Wire Gauge and Run Lengths for Each Zone
Speaker wire gauge matters because thinner wire loses more power over long distances. Lower gauge numbers mean thicker wire. For most in-wall and in-ceiling speaker runs, 16 AWG is common, but longer runs or lower-impedance speakers may call for 14 AWG or 12 AWG.
Measure each run before you buy wire. Include extra length for routing up walls, across attics and down to the equipment location. Add at least 10 to 15 percent for slack and connections.
Use this checklist when you plan wire:
- Measure each run from speaker location to central equipment
- Note the speaker impedance (usually 4 or 8 ohms)
- Choose gauge based on the longest run in each zone
- Add slack for connections at both ends
- Label every wire at both ends with its zone and speaker name
Wiring methods, including separation between audio and power wiring, are governed by the National Electrical Code (NEC) as adopted locally. Confirm the rules and the edition that applies with your building department before you start.
Lay Out the Central Equipment Location and Multi-Zone Amplifier
The central equipment location is where every speaker wire ends. It holds the multi-zone amplifier, source components, network switch and any control hardware. Choose this space early because it sets the length of most runs and the load on the amplifier.
A good location has these features:
- Close to the middle of the home to shorten wire runs
- Dry, cool and well ventilated, ideally between 65 and 80 degrees Fahrenheit
- A dedicated 15- or 20-amp circuit, separate from lighting and motor loads
- Access to internet and a cable path from the attic or crawl space
- Room for a rack, labeling and future expansion
Multi-zone amplifiers vary in channel count. Match the channel count to your zone plan, and buy one or two extra channels for growth. Adding channels later often means replacing the amplifier.
Size the amplifier to the load, not just the channel count. Most multi-zone amplifiers are rated for 4-ohm or 8-ohm loads per channel. If you plan to run two 8-ohm speakers in parallel on one channel, the combined load is 4 ohms, which most amplifiers handle.
Plan for voltage drop on long runs. A 16 AWG run of 100 feet to an 8-ohm speaker loses a noticeable amount of power compared with a 14 AWG run of the same length.
Plan for airflow. Amplifiers produce heat, so keep them away from closed cabinets with no ventilation, and leave clearance above and below each component as the manufacturer specifies.
Watch out: placing the equipment in a garage or outbuilding can expose it to humidity and extend speaker runs beyond the gauge you planned for.
Route Cables Before Drywall and Keep Low-Voltage Runs Separate from Mains
Routing cable before drywall is the most important step in new construction. Once walls close, every fix becomes expensive. Ask your framer and electrician to leave access paths through studs and joists, and walk the routes with them before any cable is pulled.
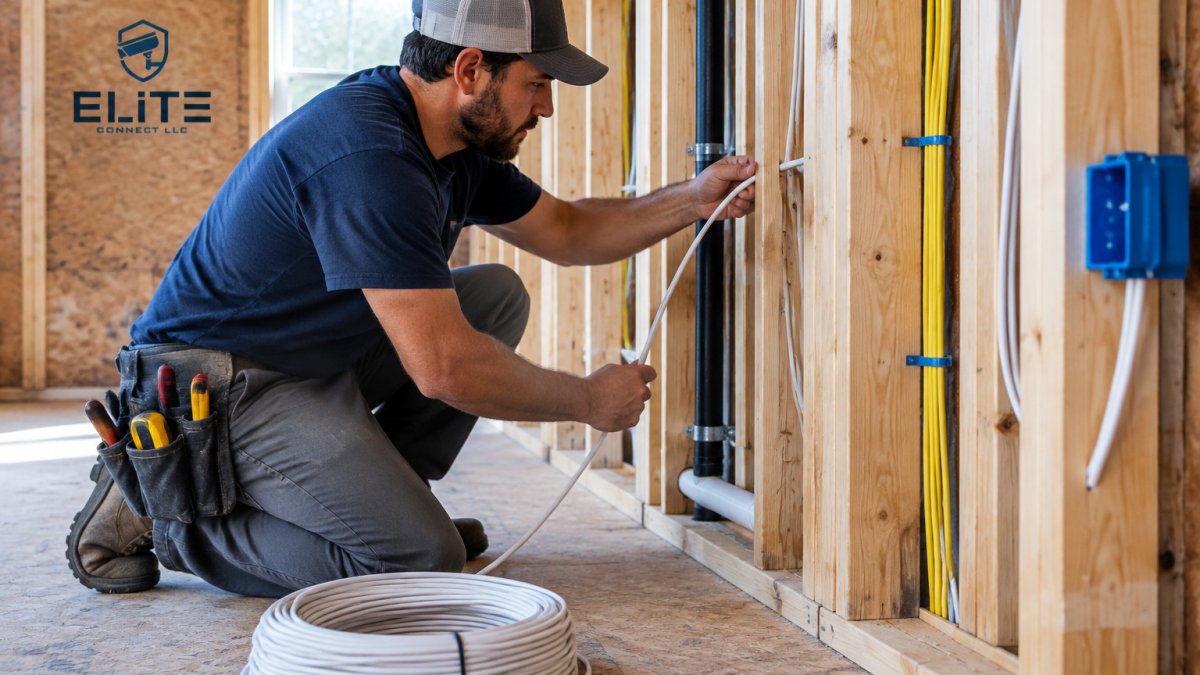
Keep low-voltage speaker wire separate from high-voltage electrical wiring. Keep low-voltage speaker wire separate from high-voltage electrical wiring, and confirm separation requirements with your building department. Running speaker wire parallel and close to power cables can introduce hum.
Follow these routing rules:
- Plan a clean path from each speaker to the equipment location, and mark it on the framing with painter's tape before drilling.
- Drill centered holes through studs and joists, and use nail plates or protective guards where cable passes within 1-1/4 inches of the stud face.
- Leave a service loop of 12 to 18 inches of extra cable at each speaker and at the rack.
- Seal firestop penetrations with listed firestop sealant or putty where cable passes between floors or through fire-rated walls. Local building code typically requires firestopping at these penetrations; confirm the requirement with your building department.
- Photograph the routes before drywall goes up, and note the measurement from a fixed reference point to each hole.
Build a written wiring schedule as you route. A simple spreadsheet with one row per speaker run is enough:
| Zone | Room | Speaker location | Cable type | Run length (ft) | Equipment channel | Label |
|---|---|---|---|---|---|---|
| 1 | Kitchen | Ceiling, left of island | 16/2 CL3 | 42 | Amp ch. 1 | Z1-KIT-L |
| 1 | Kitchen | Ceiling, right of island | 16/2 CL3 | 45 | Amp ch. 2 | Z1-KIT-R |
| 2 | Primary bedroom | Wall, headboard side | 16/2 CL3 | 68 | Amp ch. 3 | Z2-PRM-L |
Use CL3-rated or plenum-rated cable where the code requires it, and confirm the rating with your building department. Label every wire at both ends with the zone and speaker name before drywall closes. A labeled schedule and photos turn a hidden wiring problem into a five-minute fix later.
Watch out: skipping firestop sealant at floor penetrations is one of the most common inspection failures in low-voltage work, and it can require opening finished walls to correct.
Plan Your Multi-Zone Audio System Commissioning and Future Expansion
Commissioning means testing the system before handing it over. Test every speaker for polarity, volume and tone. Confirm that each zone plays the correct source and that controls work from the wall keypad and mobile app.
Document everything:
- Labeled wire schedule with zone and speaker names
- Amplifier channel map
- Network addresses and passwords stored securely
- Photos of routes and equipment rack
- Warranty and support contact information
Plan for expansion now. Leave spare conduit or extra wire from the central location to attic or crawl space. Reserve at least one spare amplifier channel and one spare network port. Future speakers, cameras or sensors can then use the same infrastructure.
Maintenance matters too. Keep the equipment room accessible, dust-free and cool. Schedule a yearly check of connections and software updates.
Book Your Whole-Home Audio Plan Review With Elite Connect
A whole home audio wiring plan works best when a licensed contractor reviews it before walls close. Elite Connect LLC provides itemized proposals and comprehensive documentation, including test results and as-builts.
Coordinating the audio work with electricians, framers and network installers under one point of accountability helps keep responsibility for the wiring, equipment and test results clear. Licensed low-voltage contractors in your area can help you verify credentials before you hire anyone.
Ready to plan your system? book a free consultation with Elite Connect LLC to review your room map and zone plan. For wiring that supports the rest of your building, see our structured cabling services. Our team can also route network and Wi-Fi infrastructure that supports the equipment room.
Frequently Asked Questions
How do you plan wiring for whole-home audio?
Start with a room-by-room map that marks where each speaker will go, then group rooms into zones based on how the home is actually used. Count the speaker runs per zone, note the distance from each zone to the central equipment location, and choose wire gauge to match. Share the finished plan with your electrician before framing and drywall, so low-voltage runs are routed and labeled while walls are still open.
What wire should I use for whole-home audio speakers?
Most in-wall and in-ceiling speakers in a typical home run well on 16-gauge speaker wire for short runs, while longer runs or higher-power speakers often call for 14-gauge or 12-gauge. Confirm the speaker impedance and the amplifier's specifications before buying, because undersized wire loses output over distance. Use a rated, labeled cable and keep runs for each zone separate.
How many speaker wires should I run to each room?
Run at least one speaker cable pair per speaker location, and add a spare run in rooms that may later need a second speaker or a ceiling speaker. A typical 3,000 to 5,000 square foot home often needs four to eight zones, each with dedicated speaker wire back to a central location. Rooms with a second speaker location, such as a kitchen with ceiling and under-cabinet speakers, need a separate pair for each location.
Can you install whole-home audio wiring in an existing house?
Yes, but retrofit work is more involved than prewiring during construction because runs must be fished through finished walls or routed through attics, crawlspaces, and chases. Wireless or hybrid designs can reduce the amount of wall work, though they may trade some reliability and audio quality. Ask a low-voltage contractor to survey the home and mark likely routes before you commit to a design.