
Table of Contents
- Why Planning Low-Voltage Wiring Before Construction Matters
- Create a Low-Voltage Wiring Checklist for Your New Build
- Develop a Structured Wiring Plan for Your New Home
- Low-Voltage Wiring Best Practices During Rough-In
- Plan for Security Cameras, Doorbells, and Home Automation
- Understand Low-Voltage Wiring Cost for a New Build
- Coordinate with Your Builder and Contractor Timeline
- Frequently Asked Questions
Last Updated: October 5, 2026
Why Planning Low-Voltage Wiring Before Construction Matters
Understanding how to plan low voltage for new construction is the difference between a home that works seamlessly and one that frustrates you for decades. Most builders treat wiring as an afterthought. They run cables haphazardly, bury them in walls without documentation, and leave no room for upgrades.
The real cost isn't the cable itself. It's the disruption, the rework, and the compromises you'll live with because fixing it properly would mean cutting into drywall. Homeowners and property managers who plan structured wiring during the framing stage can save thousands in retrofit costs and gain systems that actually scale.
Here's what changes when you plan ahead:
- You run cable before drywall closes walls, making it clean and code-compliant
- You size equipment correctly from day one, avoiding undersized switches and Wi-Fi dead zones
- You document everything, so future technicians know exactly what you have
- You build in slack and service loops, so upgrades don't require new cable runs
- You separate low-voltage and electrical runs properly, eliminating interference
The window to do this right is narrow. Once framing is complete and drywall begins, your options collapse. Plan now, or pay later.
Create a Low-Voltage Wiring Checklist for Your New Build
A structured checklist prevents the most common mistakes: forgotten outlets, misplaced equipment, and undersized infrastructure. Before construction begins, walk through your home room by room and document every device you'll need. Don't guess. Write it down.
Room-by-Room Outlet Schedule
Start with a simple spreadsheet. List every room, then identify what devices need low-voltage connections. Include obvious items like network jacks and television outlets. Also include less obvious ones: security cameras, smart thermostats, access control readers, and audio speakers.
For each room, specify:
- Number of network jacks needed
- Television or video display locations
- Security camera placement (entry points, perimeter)
- Doorbell camera or intercom locations
- Smart home automation devices (lighting controls, thermostats)
- Whole-home audio speakers
- Phone line locations (if still relevant)
Don't assume one outlet per room is enough. A media room might need three network jacks. A home office needs at least two. Bedrooms with smart locks and cameras need multiple low-voltage feeds to different locations.
Device Location Map
Draw a floor plan and mark exact locations where devices will mount. This isn't about aesthetics. It's about cable runs. A security camera mounted on the corner of your house requires cable run from a specific point on the wall. If you don't mark it now, the cable path gets blocked by HVAC ducts or structural elements.
For each location, note:
- Wall height or mounting surface
- Distance to nearest power source (for PoE switches)
- Proximity to other low-voltage or electrical runs
- Accessibility for future service or replacement
This map becomes your installation guide. Hand it to your contractor and refer to it during rough-in. Without it, cables end up in wrong locations, and you're stuck.
Develop a Structured Wiring Plan for Your New Home
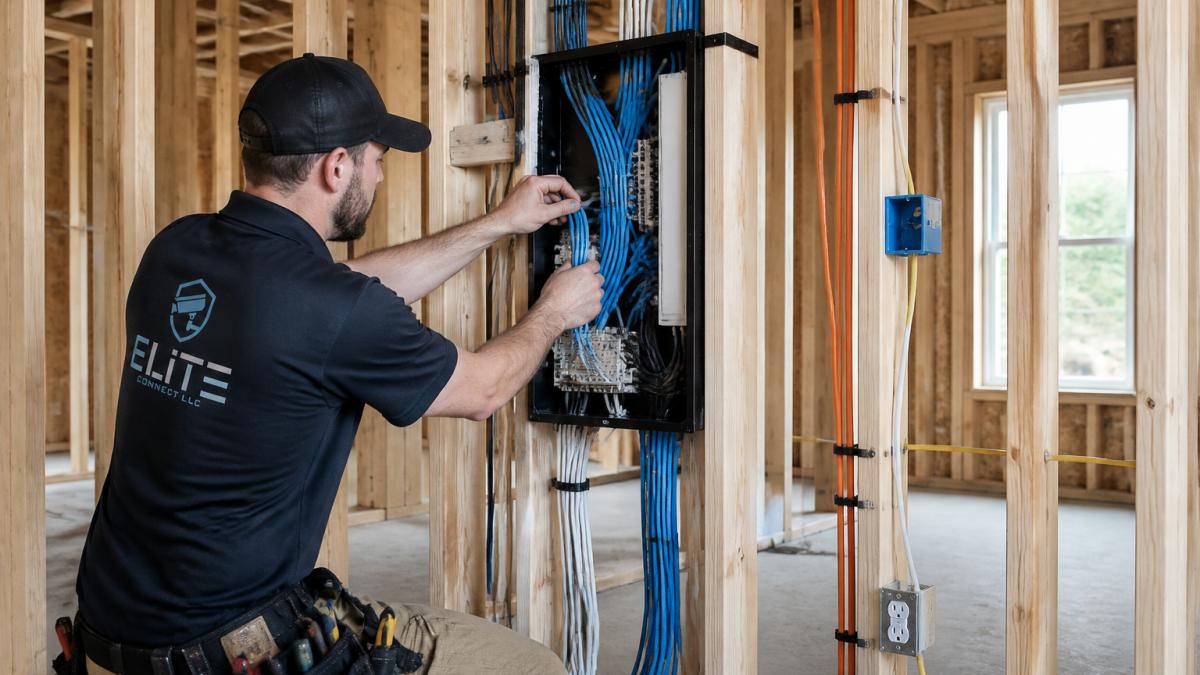
A structured wiring plan organizes all low-voltage infrastructure through a central location. Instead of random cables running through walls, everything flows from one central wiring panel. This approach saves time during installation, simplifies troubleshooting, and makes future upgrades straightforward.
Choosing Cable Types and Categories
Not all cable is the same. Your choice depends on what data travels through it. Ethernet carries network traffic. Coaxial cable carries video. Cat5e handles basic data.
For new construction, we recommend Cat6A for all data runs. It costs slightly more than Cat6 but handles future bandwidth demands without replacement. Cat6A supports gigabit speeds and beyond, future-proofing your network for years.
For video, use quality coaxial cable rated for the distance. Cheap coaxial cable degrades signal over long runs, creating ghosting or pixelation on camera feeds.
For security cameras and smart devices that use Power over Ethernet (PoE), run dedicated cable to each device. PoE delivers power and data through the same cable, eliminating the need for separate power runs.
Your cable selection should match your equipment needs:
- Network data: Cat6A for future-proof speeds
- Video surveillance: Rated coaxial or fiber for long runs
- Access control and alarms: Twisted pair or fiber depending on distance
- Whole-home audio: Shielded twisted pair to minimize interference
- Smart home devices: Cat6A or wireless, depending on device type
Central Wiring Panel Location and Equipment Sizing
Choose your central location carefully. It should be:
- Accessible for installation and future service
- Away from electrical panels to avoid interference
- In a climate-controlled space (basement, utility closet, not an attic)
- Large enough for current equipment plus 40% growth
Most homes need a structured media enclosure roughly the size of a large electrical panel. Inside, you'll mount a network switch, PoE injectors, Wi-Fi access points, security system control panels, and audio amplifiers. All cables from throughout the home converge here.
Size your network switch based on the number of devices. A 24-port switch handles most residential installations. Commercial properties need larger equipment. Undersizing here creates bottlenecks later.
For Wi-Fi, plan access points strategically. A single access point rarely covers a large home effectively. Two or three access points, positioned centrally and on different floors, deliver consistent coverage. Mount them on or near your central panel for easy cable management.
Low-Voltage Wiring Best Practices During Rough-In
Rough-in is the critical phase. This is when cables get installed before drywall closes walls. Quality work now prevents problems later.
Cable Pathways, Separation, and Bend Radius
Run cable through conduit or cable trays. Conduit protects cable from damage and makes future replacements easier. It also separates low-voltage from electrical runs, preventing interference.
Maintain proper separation between low-voltage and electrical cables. Most codes require at least 12 inches of separation. When cables must cross, do so at right angles, not parallel.
Respect bend radius specifications. Cat6A cable has a minimum bend radius of about one inch. Tighter bends damage the cable's internal structure, reducing performance. Use cable guides and proper routing techniques to maintain safe bend angles.
Label both ends of every cable run before drywall closes. Use a consistent labeling scheme tied to your device location map. Include the cable category, destination, and date installed. This documentation prevents costly mistakes during troubleshooting.
Labeling, Documentation, and Quality Control
Documentation is what separates professional installations from amateur ones. Many contractors skip this step. Don't.
Create and maintain:
- A cable map showing every run, location, and category
- A device inventory listing all connected equipment and its IP address
- Test results for all cable runs (showing proper signal strength and speed)
- As-built drawings showing final cable locations and central panel layout
Test every cable run before closing walls. Use a network cable tester to verify continuity and signal quality. Document the results. If a cable fails later, your test results prove whether the problem is the cable or the connected equipment.
This documentation becomes invaluable when you upgrade systems, troubleshoot issues, or hand off the property to new owners. It's the difference between a professional installation and a guessing game.
Plan for Security Cameras, Doorbells, and Home Automation
Security and automation devices have specific wiring needs. Plan them early or face expensive retrofits.
Security cameras require cable runs to your central panel or a dedicated network switch. Plan camera locations at entry points, perimeter coverage, and high-value areas.
Doorbell cameras need power and network access. If you're using PoE, a single cable delivers both.
Smart home automation devices (thermostats, lighting controls, smart locks) typically use wireless connections. However, wireless coverage depends on access point placement.
For whole-home audio systems, run dedicated speaker cable from your central panel to each room. Shielded twisted pair prevents interference from electrical runs.
According to the National Electrical Code guidance on low-voltage installations, all low-voltage wiring must meet fire-safety and accessibility standards. Your contractor should be familiar with these requirements.
Understand Low-Voltage Wiring Cost for a New Build
Cost planning prevents budget surprises. Low-voltage infrastructure costs less during new construction than retrofit work, but prices vary based on scope and complexity.
Cost Drivers and Budget Planning
The main cost drivers are:
- Cable type and category: Cat6A costs more than Cat5e, but offers future-proof performance
- Distance and complexity: Longer runs and more device locations increase labor
- Central equipment: Network switches, PoE injectors, and Wi-Fi access points represent a significant portion of total cost
- Documentation and testing: Professional documentation and cable testing add cost but prevent expensive problems later
For budget planning, consider:
- Cable cost per linear foot (varies by category and quality)
- Equipment cost for your central panel (switches, injectors, panels)
- Labor cost for installation and testing
- Contingency for unexpected obstacles during rough-in
Bundling services with a single contractor simplifies budgeting and coordination. When you hire separate contractors for data cabling, security, and audio, costs often exceed single-source pricing because of coordination overhead and redundant equipment.
Single-Source vs. Multiple Contractors
Hiring one contractor who handles data cabling, security, and audio systems simplifies the process. A single point of accountability means one person coordinates the work, ensures proper separation and labeling, and delivers complete documentation.
Multiple contractors often create conflicts. One contractor runs cables without proper separation from electrical. Another installs equipment that doesn't integrate with existing infrastructure. Finger-pointing follows when systems don't work together.
Elite Connect LLC manages nine distinct trades under one roof. This approach eliminates coordination gaps and ensures your infrastructure is designed, installed, and documented as one cohesive system.
Coordinate with Your Builder and Contractor Timeline
Low-voltage installation must happen during specific phases of construction. Timing is everything.
Schedule low-voltage work to begin after framing is complete but before drywall installation. This window is narrow.
Communicate your low-voltage plan to your builder early. Provide your device location map and cable routing diagram.
During rough-in, be present or have your contractor present to verify cable placement.
After cable installation, test everything before walls close.
Schedule your central equipment installation after rough-in is complete.
The Telecommunications Industry Association standards for residential wiring provide guidelines for cable installation practices.
Learning how to plan low voltage for new construction requires discipline and foresight.
Elite Connect LLC brings meticulous planning and professional execution to residential and commercial low-voltage projects.
Frequently Asked Questions
What structured wiring should I plan for my new home?
A structured wiring plan integrates data cabling, voice cabling, video coaxial cable, and control lines into a central wiring location. Plan for Ethernet drops in every room, security camera runs to entry points and outdoor areas, Wi-Fi access point locations, home theater and audio runs if needed, and smart-home automation lines. Work with your contractor during framing to route conduit before drywall closes. Document every cable run, label both ends, and maintain a cable map showing future expansion capacity.
When should low-voltage wiring be installed during construction?
Install low-voltage wiring during the rough-in phase, after framing is complete but before drywall is hung. This is the only practical time to run cable through wall cavities without costly retrofitting. Coordinate with your electrical contractor to ensure proper cable separation from high-voltage lines and to avoid interference. Have your low-voltage scope finalized and approved before framing begins so no delays occur during the critical pre-drywall window.
How many Ethernet drops should I plan for each room?
Plan at least two Ethernet drops per bedroom and office, one in the kitchen, one in the living room, and one in each bathroom or media space. Bedrooms with smart-home devices benefit from additional drops. Over-provision conduit and slack cable to support future expansion without retrofit. Consider Power over Ethernet (PoE) capability for Wi-Fi access points, security cameras, and access-control devices. Label every drop clearly and document its location on your cable map.
What is the difference between Cat5e, Cat6, and Cat6A cabling?
Cat5e supports up to 1 Gbps and works for basic internet and phone. Cat6 handles 10 Gbps and offers better shielding against interference. Cat6A supports 10 Gbps over longer distances and provides superior performance in high-density environments. Fiber optic cable offers future-proof capacity for larger projects or properties requiring long-distance runs without signal loss.